Create a Custom Shape and Custom Brush in Photoshop CS6 in 20 Minutes
If you are familier with Photoshop working tools, you would be aware of the default custom shapes and custom brushes that comes with it. However, many a times the default shapes and brushes may not suit to your requirements. But to overcome this kind of situations, you can create your own custom shapes and custom brushes, which you can also use in future projects. In addition to this, once you create a custom shape or custom brush for a particular element, you’ll be able to save a lot of time as you won’t need to create them again for the same element.
Here is a tutorial through which you’ll learn how to create a custom shape and custom brush in Photoshop CS6. So before you try to search and download shapes and brushes from the internet, won’t it be a good idea to create them on your own.
So let’s get started!

Create and Define a Custom Shape
Custom Shapes play a very important role in Photoshop. Working with custom shapes can save your precious time, that you can utilize on other aspects of web design, development, marketing, etc. Once you’ve created a custom shape, you can generate a new copy of that shape in any color, size, and also give it some unique style.
In this tutorial, we’ll be creating an Apple iPad Shape, and then define that iPad shape as a custom shape. So let’s understand the entire process from the beginning till the end step-by-step.
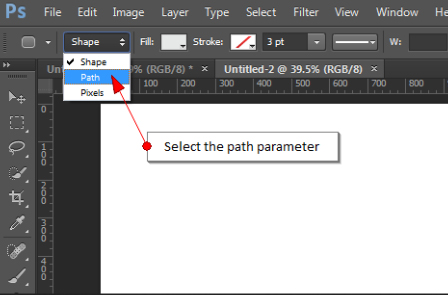
Step 1: Create a New Photoshop File
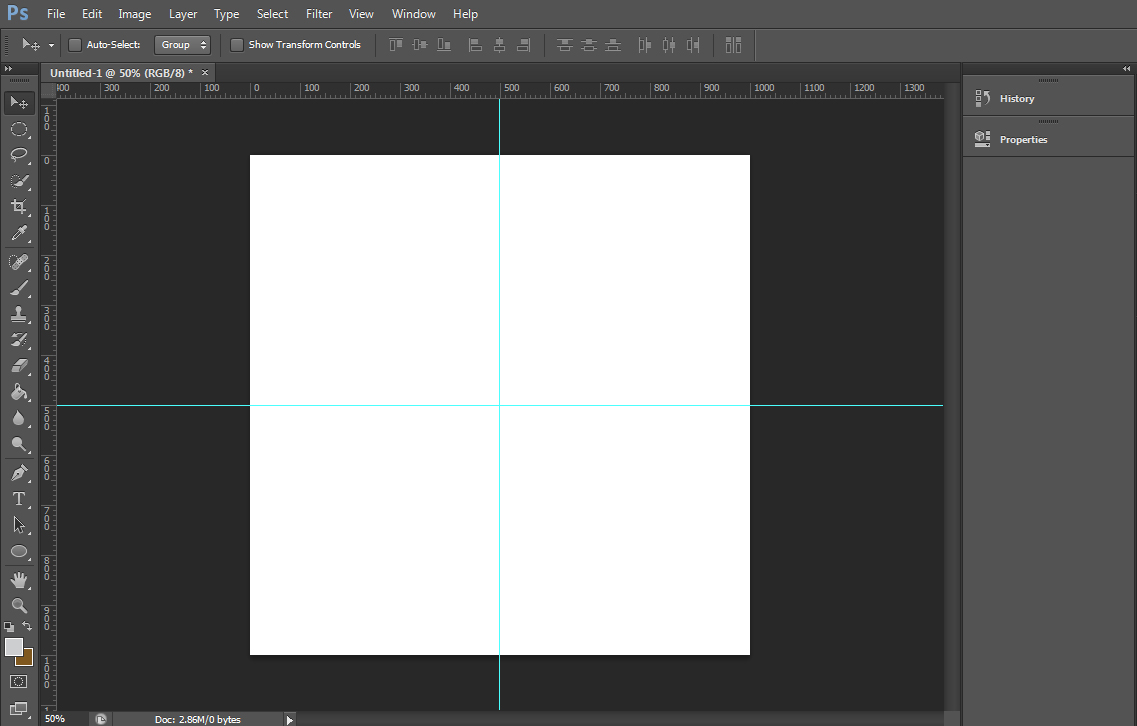
Create a new 2000 x 1500 pixels Photoshop file to design and define your custom shape. Now select the shape tool from the tool pallete, and change the “Shape” parameter to “Path” parameter in the option bar provided just below the menu bar. Remember, this is the most crucial step for creating a custom shape, so don’t miss that.
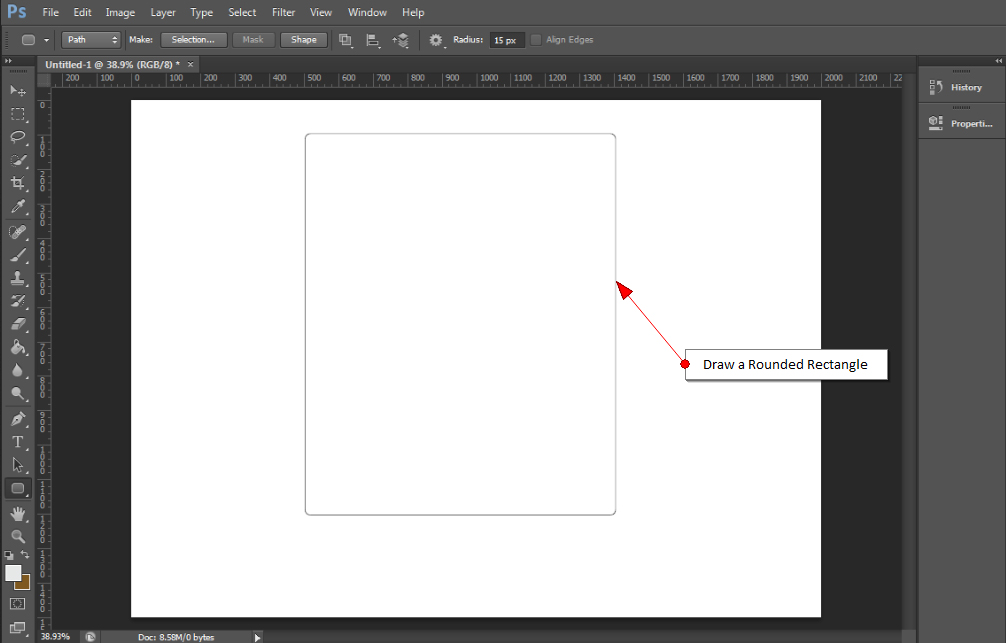
Step 2: Draw a Rounded Rectangle
Now pick the ‘rounded rectangle tool’ from the “shape tool” and draw a rounded rectangle path.
Step 3: Draw a Rectangle inside Rounded Rectangle
After that, select the ‘rectangle tool’ and draw a rectanglular path inside the path that we just created in the previous step.

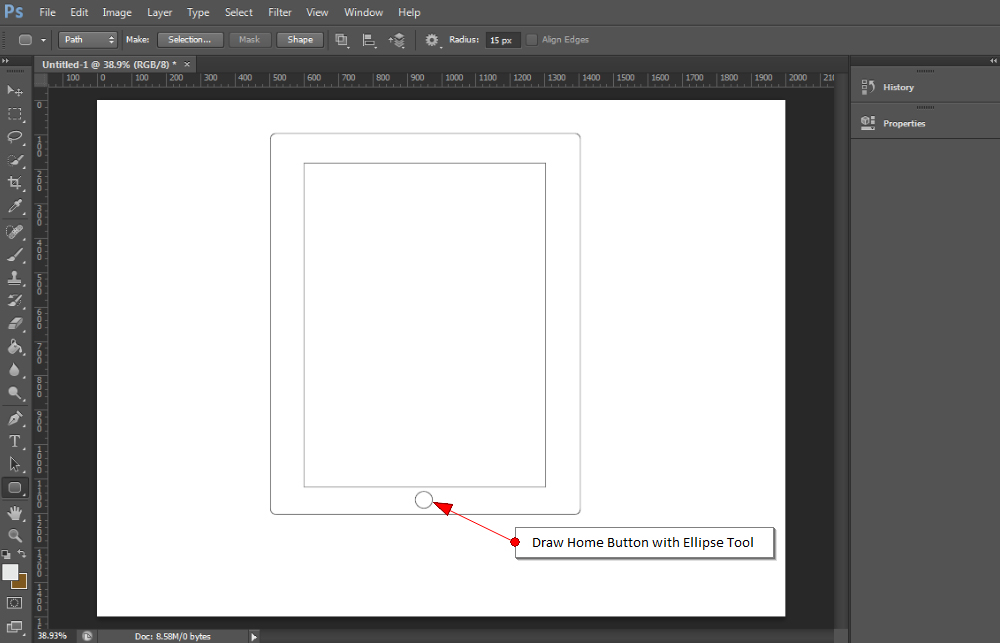
Step 4: Draw Home Button with Ellipse Tool
Now, take the center of the shape path (here, you can take the help of rulers/guides) that we just created, and draw a circular home button on the lower part of the iPad shape path, by selecting the ‘ellipse tool’ from the shape tool, between rectangle and rounded rectangle.
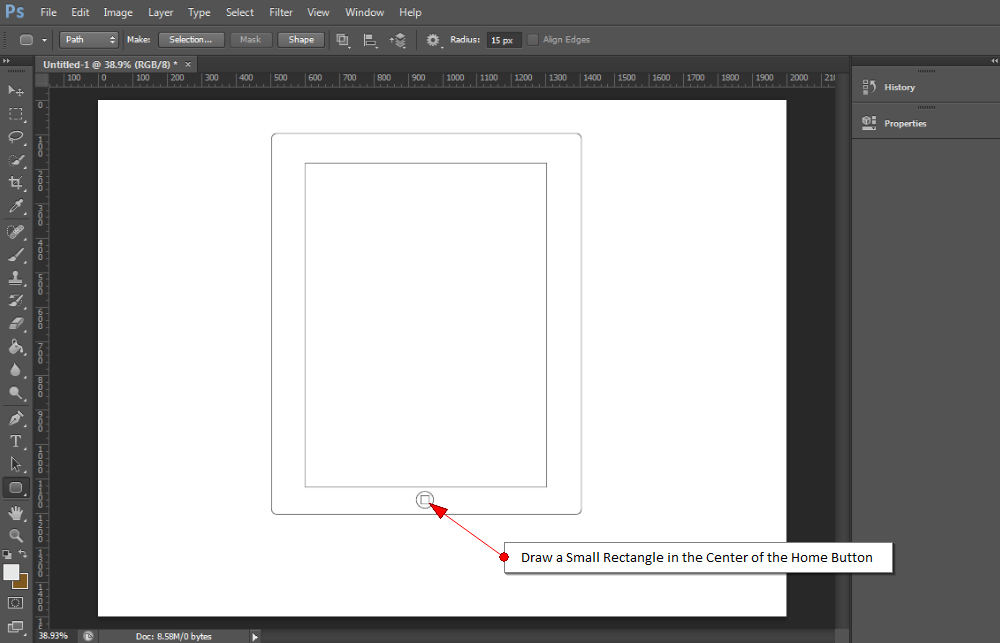
Step 5: Draw a Small Rectangle in the Center of the Home Button
After drawing the home button, select the rectangle tool and draw a small rectangle inside the home button of iPad.
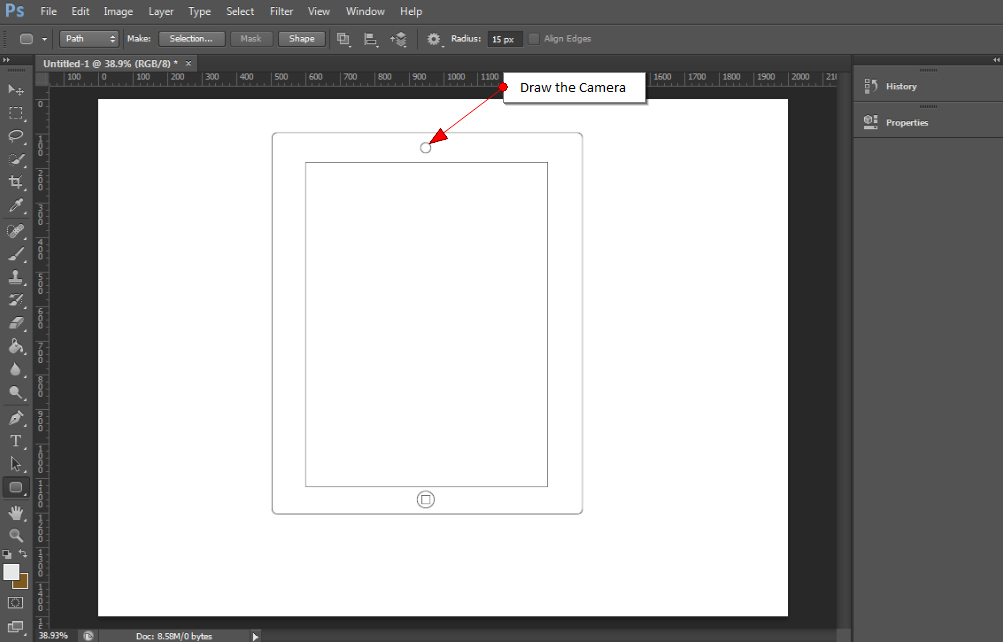
Step 6: Draw the Camera
Now using the ellipse tool, draw a small camera path in the center of the upper part of the iPad shape path, between the Rounded Rectangle and Rectangle. And, we are almost done!
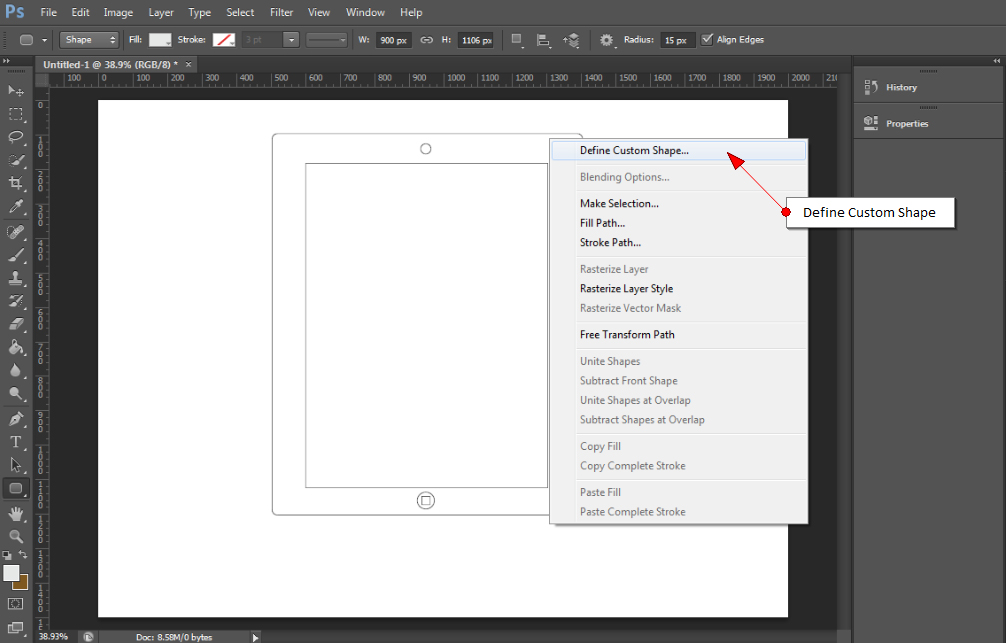
Step 7: Define Custom Shape
As you can see, we are done with the iPad shape path, we now need to define it as the custom shape. So go ahead and right click on the iPad shape path and select “Define Custom Shape”. You can also find “Define Custom Shape” inside the Edit option available in the Main Menu bar.
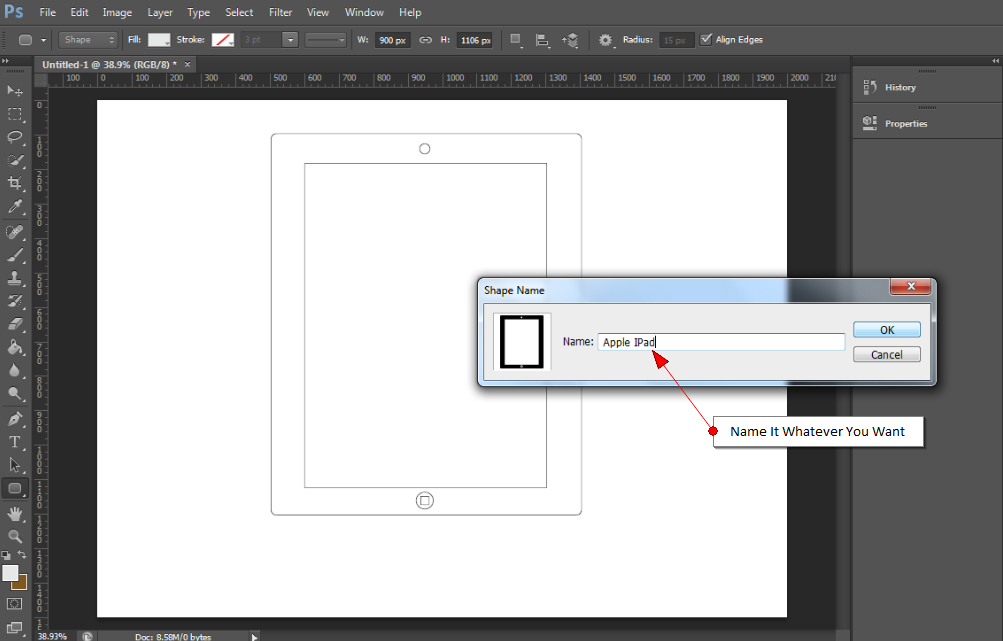
Step 8: Name It Whatever You Want
After clicking on “Define Custom Shape”, a window will popup, where you can name your custom shape as well as see its preview. Here, we have named it as an “Apple iPad”, but you are free to keep it whatever you like.
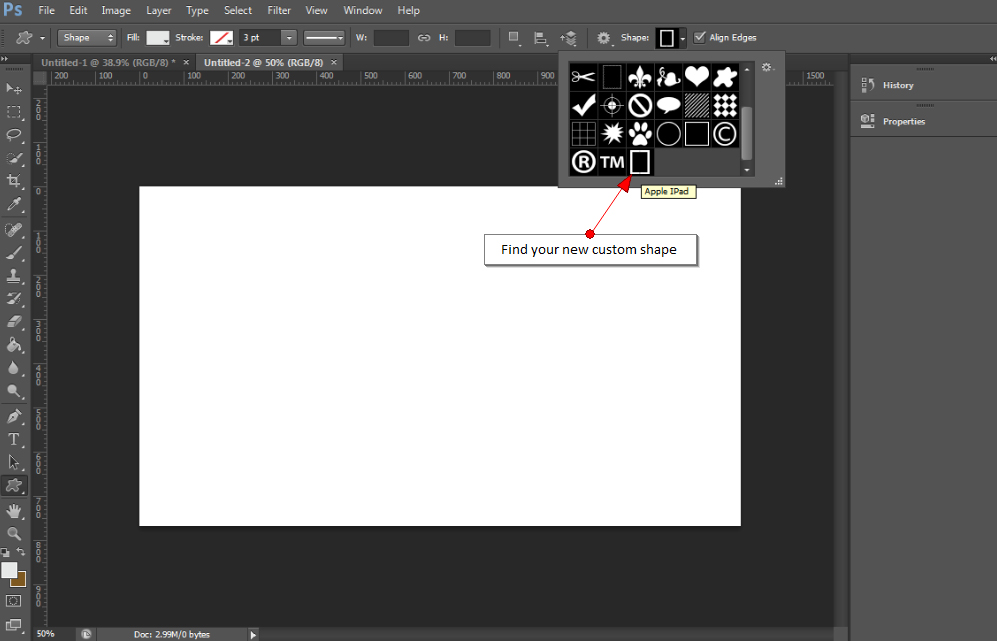
Step 9: Open a New File and Play with Your New Custom Shape
Now create a new Photoshop document and select the “Custom Shape Tool” located inside the shape tool. Then go into the “Shape Panel”, where you’ll find your new custom shape. Select your iPad shape, and make an iPad of any size, color, and also add some layer style to make it look like a real iPad.
A Quick Tip: Draw the shape while holding down the Shift key as it’ll keep the shape in proportion.
That’s all about creating and defining new custom shapes.
Create and Define a Custom Brush
After learning how to create custom shapes, now let’s move ahead, and learn how to create custom brushes in Photoshop CS6. By default Photoshop contains a lot of brushes, but sometimes none of the preset brushes offer what you exactly require.
A lot of people think that it’s very hard to create your own custom brush in PS, but the fact is entirely opposite to the notion. That’s because, any image or other graphical element can be used to create a custom brush. Photoshop allows to save a custom brush in the “Brush Presets” section, which you can use whenever required.
Now to make a custom brush, we’ll create an Apple Logo and define it as our custom brush preset.
Let’s see how it’s done.
Step1: Create a New File and Set the Rulers
Create a new 1000 x 1000 pixels Photoshop document and set the vertical and horizontal rulers in the middle of it. Here, we have set the rulers at 500 px, both horizontally and vertically. By setting the rulers, you’ll be able to recognize the center of the file and produce a better shape.
Step 2: Draw a Vertical Egg Shape with the Help of Ellipse Tool
After setting the rulers, select the ‘ellipse tool’ from the ‘shape tools’ and draw a vertical egg like shape at the center. Also remember that you can move your shape by pressing ‘Shift + a’ on your keyboard.

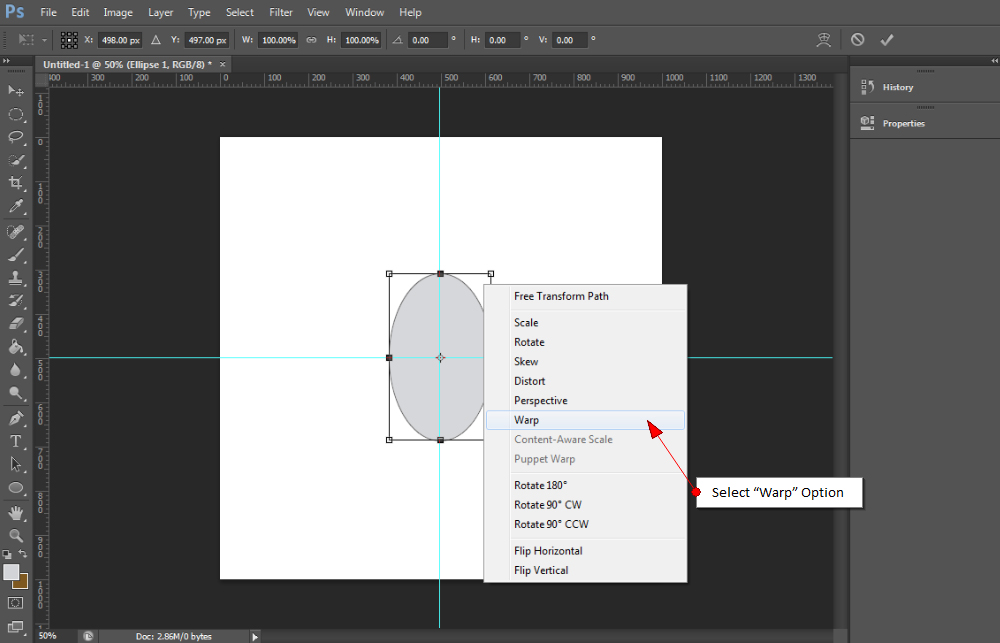
Step 3: Select “Warp” Option
Now select the egg like shape by pressing Ctrl + t (Windows) / Command + t (Mac), and right click on it and select the “Warp” option.
After selecting Warp, stretch the shape from its left and right sides of the upper part.

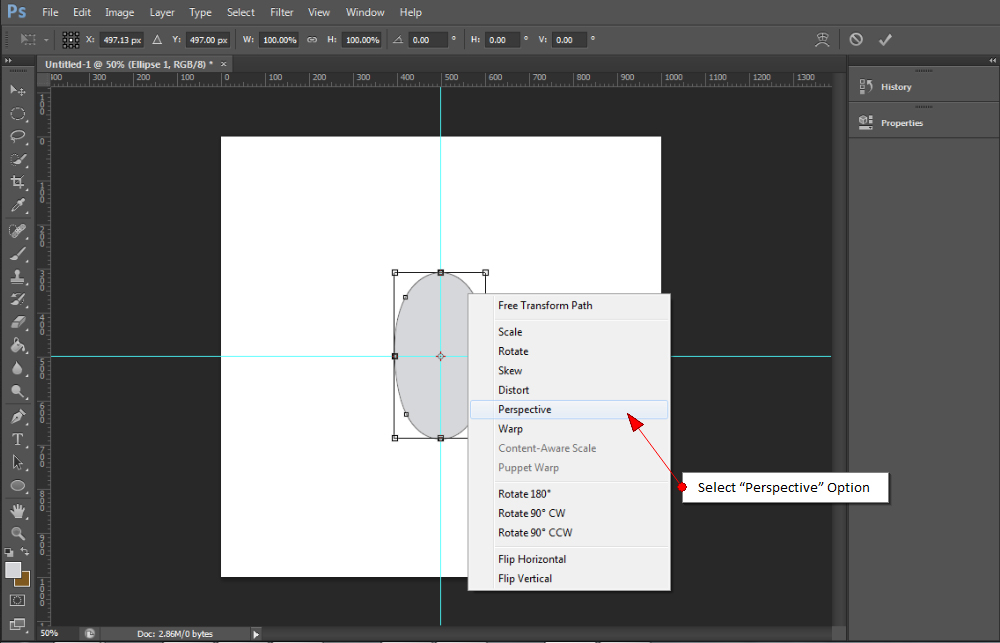
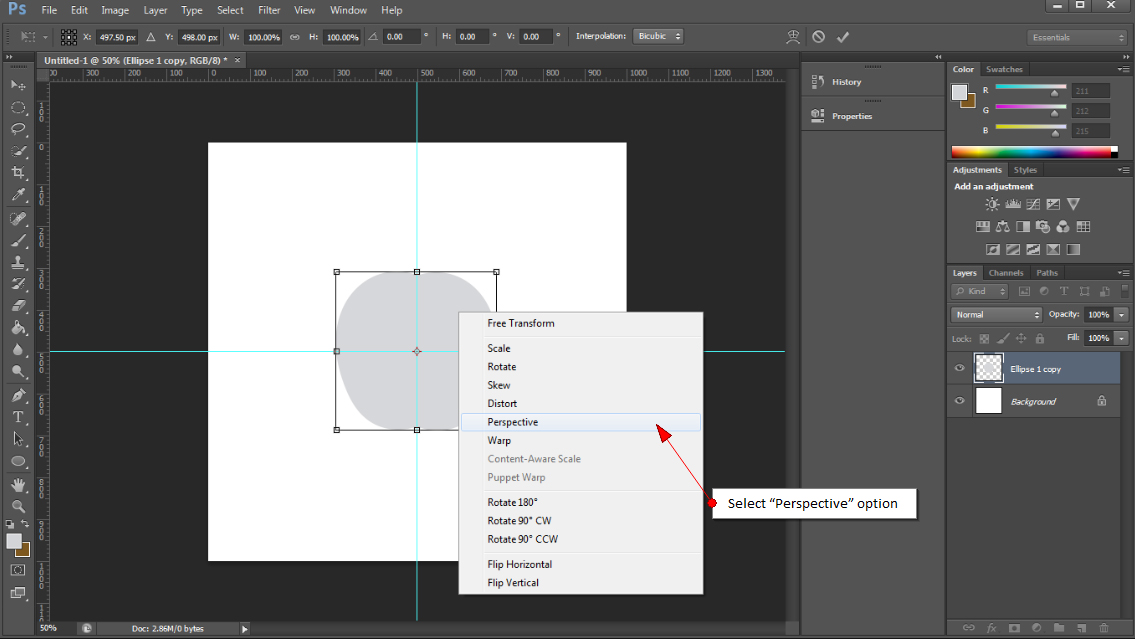
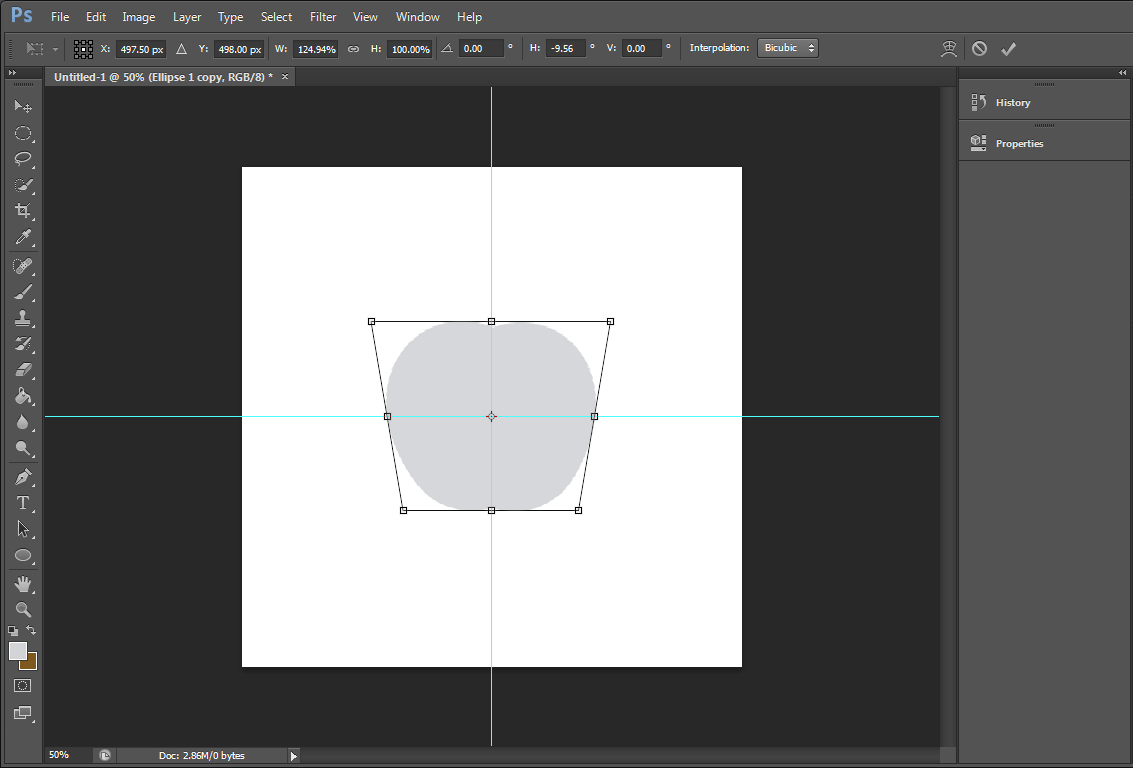
Step 4: Select “Perspective” Option
Again press Ctrl + t / Command + t. Right click on the shape and select “Perspective” option.
Now stretch the shape from the upper and lower sides.

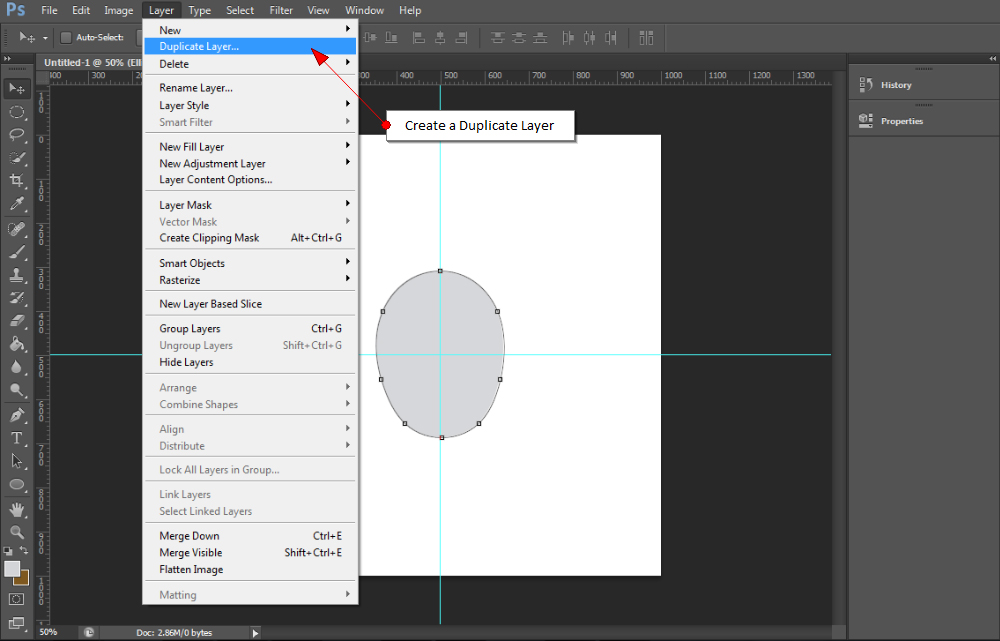
Step 5: Create a Duplicate Layer of Edited Shape
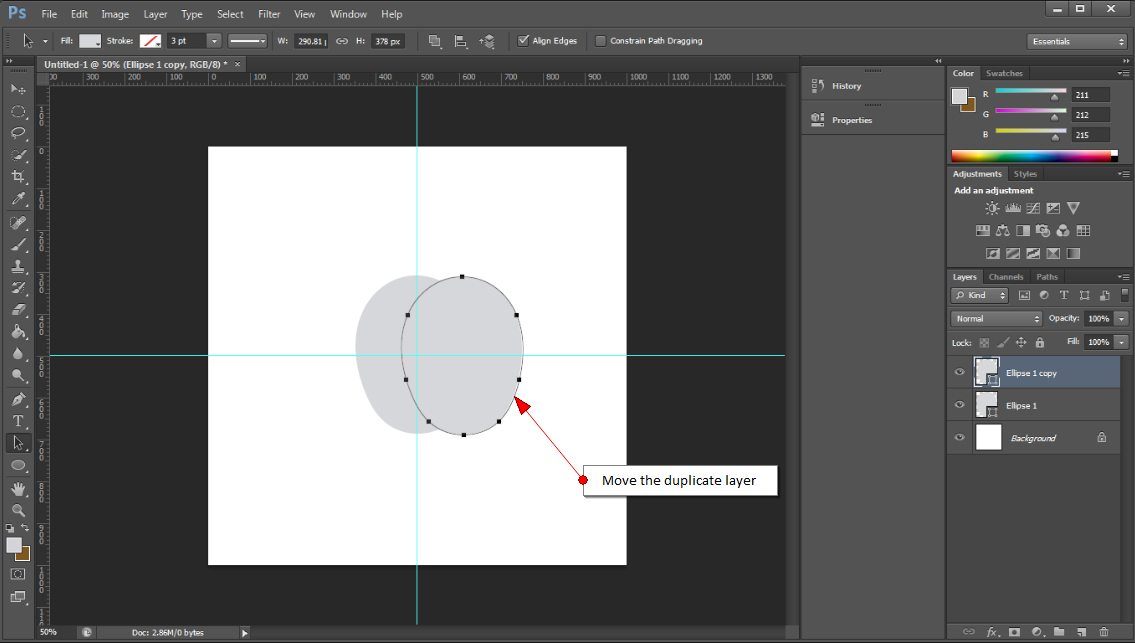
After stretching the shape, create a duplicate layer of it by going up the Layer Menu in the Menu Bar and choosing Duplicate Layer.
Then move that duplicate layer to the right to form an apple like shape.
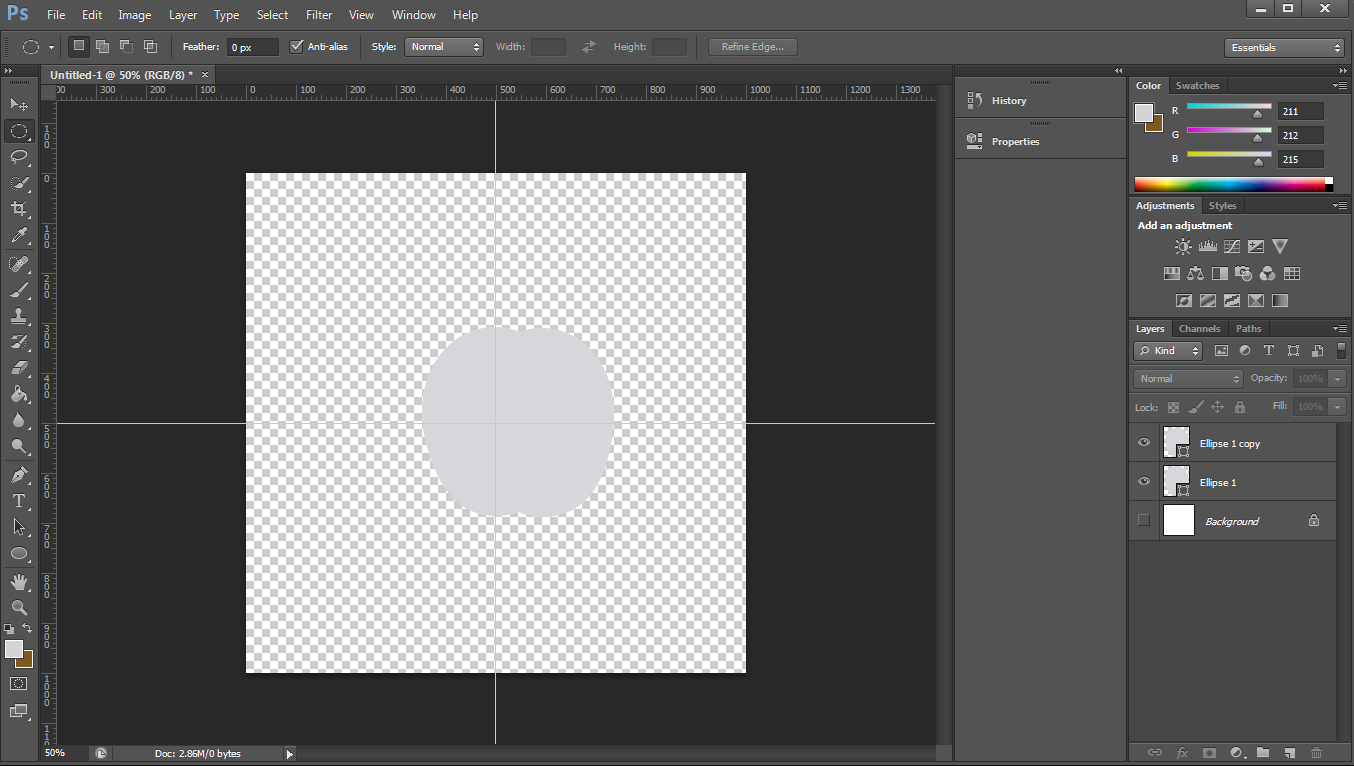
Step 6: Disable Background Layer Visibility and Merge Both Shapes
After getting an apple like shape, disable the background layer visibility.
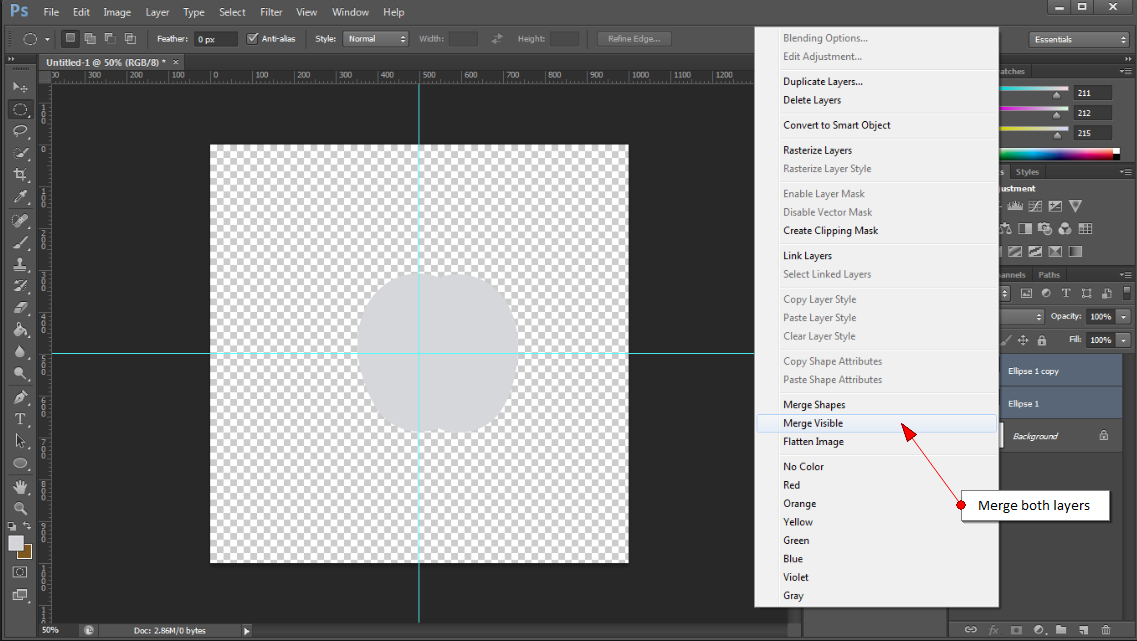
After that, select both original and duplicate layer in the layer pallete by pressing Ctrl or Command key. Right click and choose “Merge Layer” option. It’ll combine both images into a single image.
Step 7: Select “Perspective” Option
After merging both the shapes into one, enable background layer visibility. Right click on the new shape and select “Perspective”.
And elongate its shape from the upper and lower sides to get an apple shape as shown in the screenshot given below.
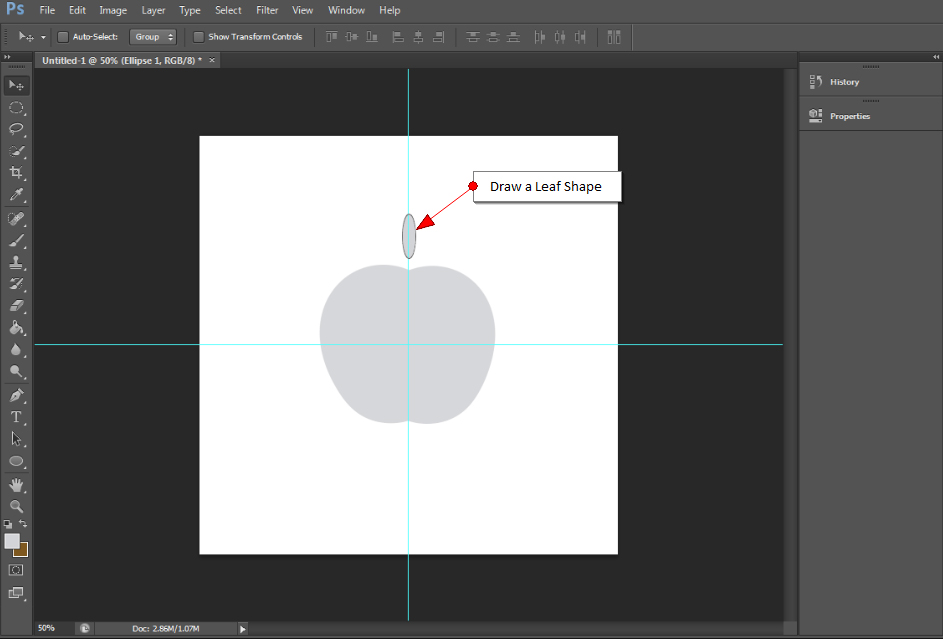
Step 8: Draw a Leaf Shape
Create a small leaf shape with the help of ellipse tool, just above the upper side of the apple shape.
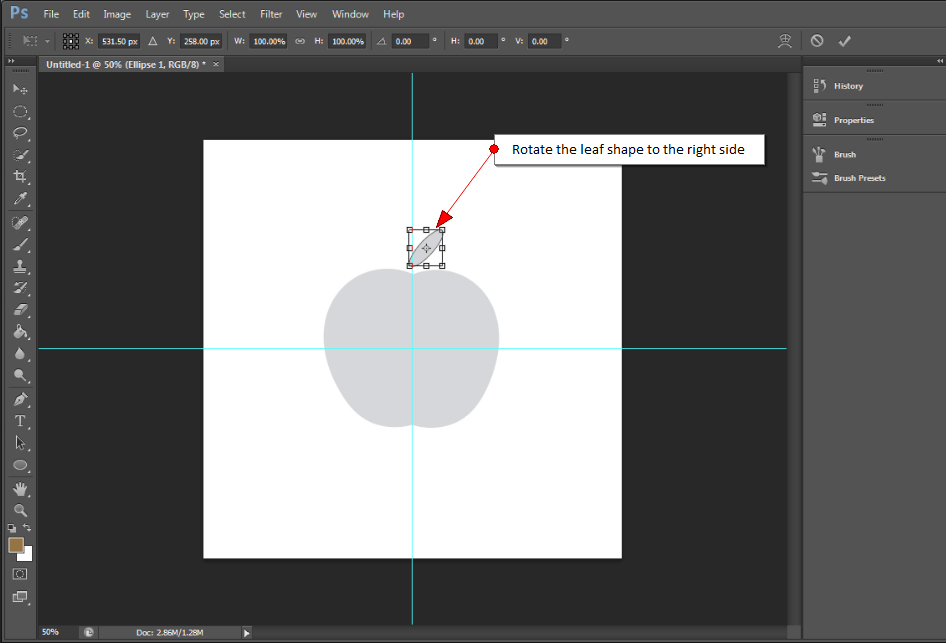
And rotate the leaf shape to the right side, as shown below in the screenshot.
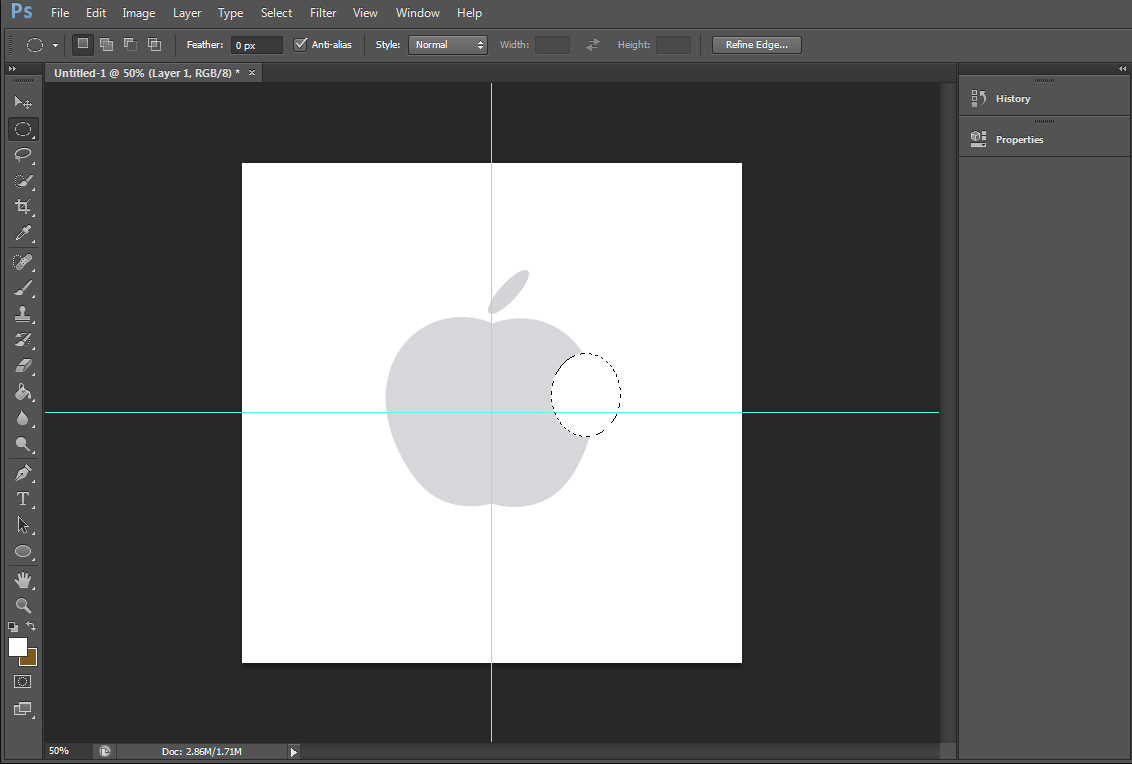
Step 9: Cut the Apple Shape from its Right Side
Now use the “Elliptical Marquee Tool” on the right side of the apple shape as displayed in the screenshot given below:
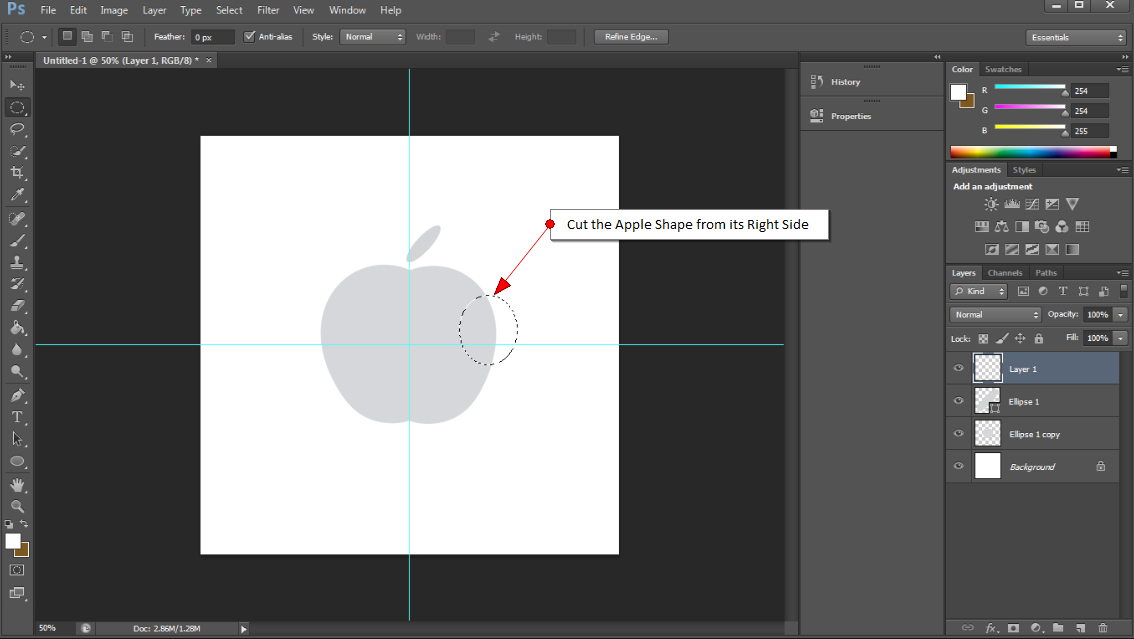
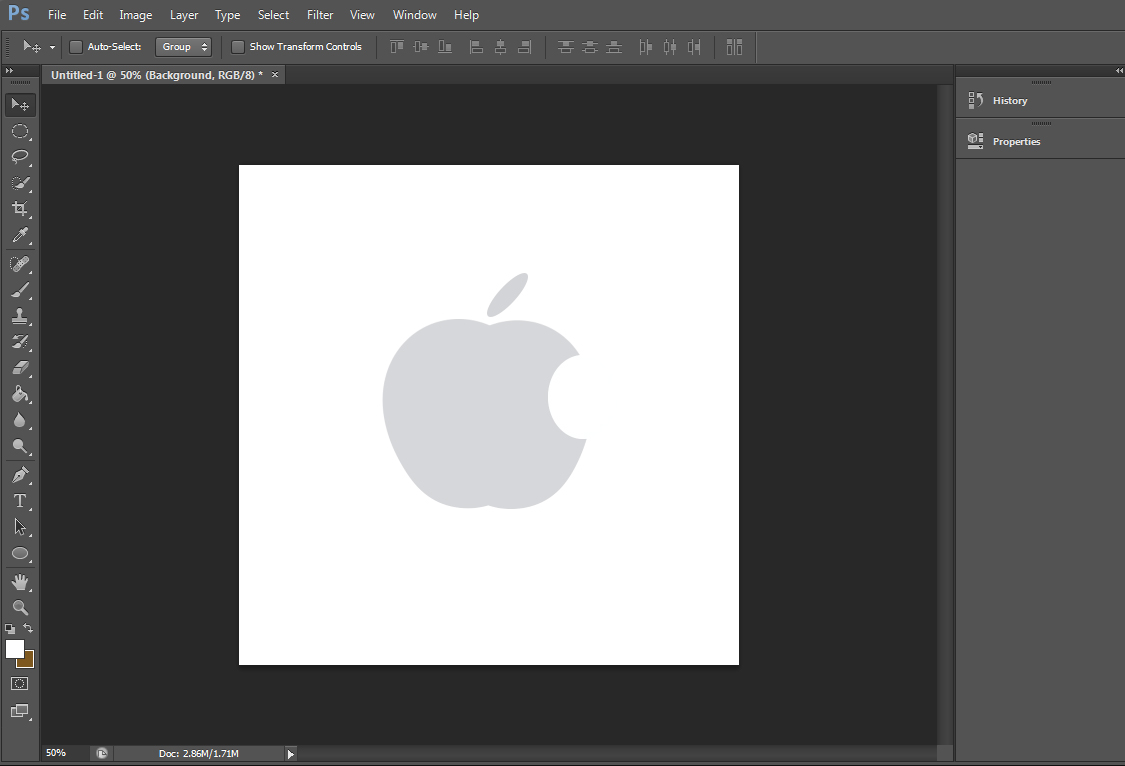
And then fill the elliptical marquee with white color, using the paint tool. Doing this will make the apple shape look like as if it has been cut from that side.
Congrats! You’ve just made your “Apple Logo”
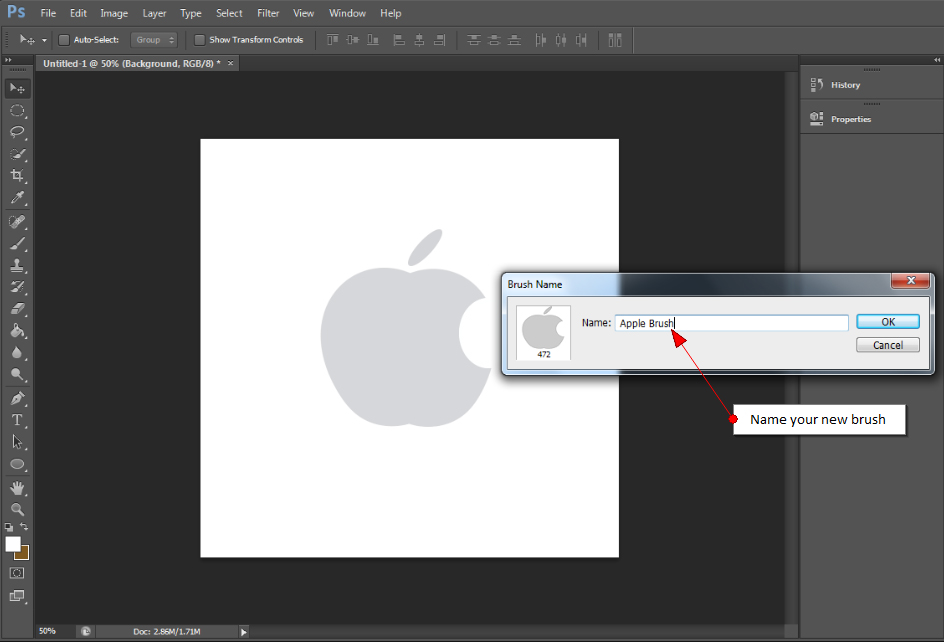
Step 10: Define Custom Brush
Now go to edit menu and select the “Define Brush Preset” option.
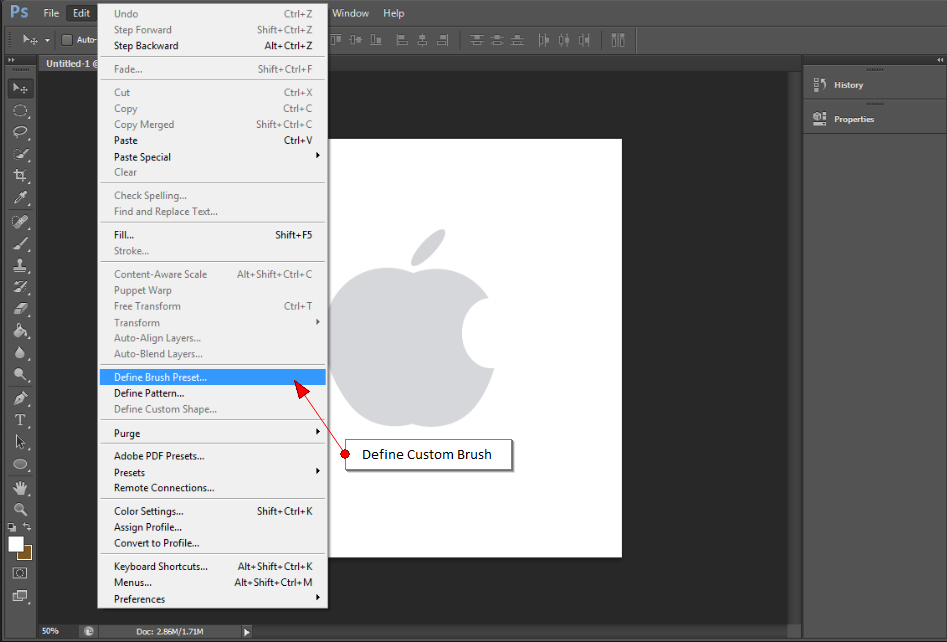
Photoshop will popup a dialog box asking you to name your new brush. It’ll also show you a preview of how your brush will look and the default pixel size of the brush.
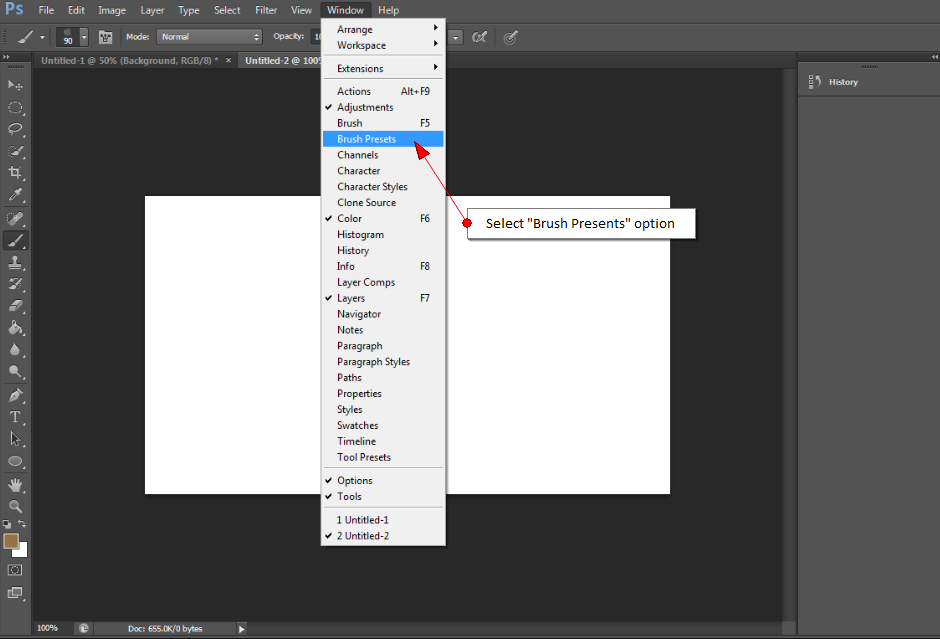
Step 11: Play With Your New Custom Brush!
Finally, you can find your new brush inside the brush presents by going up the Window Menu in the Menu Bar.
And there we have it!

So, these are the basics of creating your own custom shapes and brushes. No doubt, these are huge time savers!
Hope you’ll enjoy while creating your own custom shapes and brushes. If you have any suggestion, query or any other tips related to creating custom shapes and brushes, you can leave them in the comment section given below.