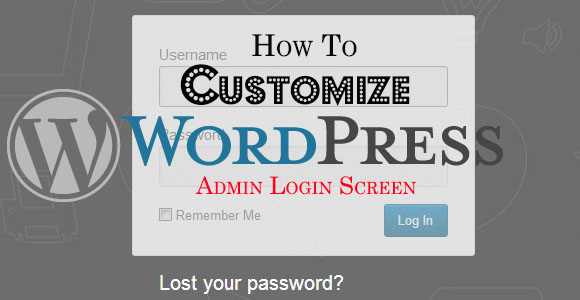
How to Customize the WordPress Admin Login Screen
In my previous post I talked about customizing the WordPress Admin Dashboard. Now I am going to teach you how to change everything there is to change in the WordPress login screen. And just like the Admin Dashboard, changing the Login Screen is super easy once you know all the right functions and variables.
So why would we want to change the Login Page? Well there are a number of reasons. First if you are going to make custom professional themes for branded organizations, they will always prefer if their company’s logo is flashed when they reach the login page. Second, the WordPress login page is sometimes even used as the default login gateway for multiuser websites, so it would be best to customize it so that it reflects your website’s design and brand. And the last and the most important reason for changing the login screen styling is that it would look much cooler with custom design.
IN this tutorial we are going to change the WordPress logo to our custom logo, change the whole styling of the login page, and change the Login URL from WEBSITE.com/wp-admin.php to something more memorize able.
Just like the previous post, here also we would be altering function.php file of the WordPress theme. As you learn more and more about WordPress, you would realize that whatever we are going to do in this post, we can also do it directly and permanently by tampering with the WordPress core. Do not in any case change the WordPress core until and unless you know what you are doing. Besides the moment you update your WordPress version, those changes will go away and you would have to perform them again. It is much easier and much secure to perform these changes through function.php of the theme.
Also for styling our login page we are going to create a custom CSS file named custom_login.css, and then load it into WordPress. I have placed this file in a folder named CSS that is placed in the Twenty Twelve theme folder. You can change the location of your file as per your requirements.
So let’s get started
#Changing the Login Logo
The first step is to change the WordPress logo. The logo of your brand is a very powerful tool and you should use it wherever you can. And showcasing it on the login screen is just the way to promote your business and brand with a simple image.
To change the logo we would have to load our custom CSS into WordPress and we are going to do it through function.php. Just add the following lines of code to your function.php file of the theme
function custom_login() {
	echo '<link rel="stylesheet" type="text/css" href="' . get_bloginfo('stylesheet_directory') . '/css/custom_login.css" />';
}
add_action('login_head', 'custom_login');
Here I have created a custom function named custom_login and executed it through the action hook “login_head”. This custom function loads the custom CSS file that we have created and tells WordPress to include it in its list of files.
To change the logo, all we have to do add the following lines of code in our custom_login.css
#login h1 a {
	background-image: url("http://www.YOUR-WEBSITE.com/YOUR-LOGO_LOCATION/logo.png") !important;
}
Here !important declaration is important. This overrides any previous settings for h1 a tag and tells the browser to give priority to our settings.
![]()
#Changing the Login Page Background and Other Settings
Now that you know how to load the CSS, changing the background and settings of the login page is very easy. Just add your custom styling to custom_login.css and customize your login page as per your wishes.
For example:
To change the background add the following piece of code in custom_login.css
body
{
background-image: url("http://www.creativeweblogix.com/common/images/banner_bg.jpg") !important;
}
You can customize the background image or color as per your requirements. Similarly you can alter other settings also. For example change the login box by adding following code.
.login #nav a, .login #backtoblog a {
text-shadow: none;
font-size: 150%;
font-family: Arial, Helvetica, sans-serif;
text-decoration: none;
color: 	#ffffff !important;
}

.login form {
opacity:0.8;
-webkit-box-shadow: none;
box-shadow: none;
}
#Changing the URL of the Logo
Now we are going to change the location that our Logo will point to. By default the login page Logo links back to WordPress.org. Since it’s our professional website we are going to change the link so that it points to the home page of our website.
Add the following piece of code in your function.php.
function custom_url( $url ) {
    return get_bloginfo( 'url' );
}
add_filter( 'login_headerurl', 'custom_url' );
As you may notice, this function returns the URL of your WordPress website automatically. But if you wish to add a custom URL you can use the following code.
function custom_url( $url ) {
    return “http://www.YOUR-WEBSITE.com/”; // Your custom URL
}
add_filter( 'login_headerurl', 'custom_url' );
#Changing the default Login URL
The standard URL to open the WordPress login page is something like http://www.YOUR-WEBSITE.com/wp-login.php. But people who are not familiar with WordPress will find that using login.php instead of wp-login.php is much easier as it easy to remember. So if you are making a professional website for a non-technical client, it is better to change the login URL.
You can change the login URL by modifying the .htaccess file. You would find the .htaccess file in the root of the WordPress folder. In many versions it is even hidden so check your settings. And even if it is not present you can create one easily through any text editor software like Notepad or Notepad++.
Just add the following line of code at the top of .htaccess file.
RewriteRule ^login$ http://www.YOUR-WEBSITE.com/wp-login.php [NC,L]
Here you can replace the login keyword by any other key word you like. Now all you have to do to open the login page is type the URL http://www.YOUR-WEBSITE.com/login in your browser and it will automatically take you to WordPress login page.
After the change, your .htaccess would look something like this
RewriteRule ^login$ http://www.YOUR-WEBSITE.com/wp-login.php [NC,L]
# BEGIN WordPress
<IfModule mod_rewrite.c>
RewriteEngine On
RewriteBase /wordpress-testing/
RewriteRule ^index\.php$ - [L]
RewriteCond %{REQUEST_FILENAME} !-f
RewriteCond %{REQUEST_FILENAME} !-d
RewriteRule . /wordpress-testing/index.php [L]
</IfModule>

# END WordPress
#Wrapping Up
By now you would be an expert in customizing WordPress admin panel and WordPress login page. Once again I would like to warn you not to tamper with the WordPress core files. But if you need references for finding out the CSS classes and tags that WordPress uses for styling admin menu pages, you can refer to wp-admin.css and wp-admin.min.css files. They are located in WORDPRESS_FOLDER/wp-admin/css/ folder. Also you can use inspect element tools of Google Chrome and Firefox to know more about CSS properties and classes that are used in the page. If you are facing any problem, or if you want to share some more tricks regarding WordPress Login page, feel free to leave a comment below.