How to Install and Configure WordPress Contact Form 7 Plugin?
One of the best things about WordPress is its plugin architecture that allows both developers and users to bring functionalities they had never imagined possible. WordPress plugins, which are composed of various PHP scripts, either add new features or enhance existing ones to extend your site’s functionality beyond the core installation. In other words, you can tailor your WordPress site to your specific requirements through plugins.
From optimizing your WordPress site for search engines to increasing the conversion rate to protecting your site against spam, you can do almost everything through plugins. The official WordPress plugin repository currently has nearly 58,000 plugins, all of them having their specific functionalities. One of the most popular plugins out there is Contact Form 7 that allows you to create and manage multiple lead-generating contact forms. Through this tutorial, you’ll learn:
HIGHLIGHTS
- Different Ways to Install WordPress Contact Form 7 Plugin?
- How to Configure WordPress Contact Form 7 Plugin?
- How to Add Captcha on Contact Form 7?
Let’s start with different ways of installing the WordPress Contact Form 7 plugin!
How to Install WordPress Contact Form 7 Plugin?
Whether you’re a WordPress beginner or expert, installing Contact Form 7 plugin is very straightforward. There are three ways you can install a plugin in WordPress:
- Automatically, using the search option in the admin panel.
- Manually, using the upload method in the admin panel.
- Manually, via FTP Manager.
Let’s go through each one by one!
#Automatically, Using the Search Option in the Admin Panel
This is undoubtedly the easiest way to install a plugin on a WordPress-powered website, but the condition is that the plugin must be available in the WordPress plugin directory. Only GPL-compatible free plugins that follow WordPress plugin guidelines are hosted on this directory.
To add a WordPress plugin, log on to your WordPress Dashboard and click on Plugins » Add New. You’ll see a Search Box, where you have to enter a descriptive keyword or the plugin’s name, which is Contact Form 7 in this case.
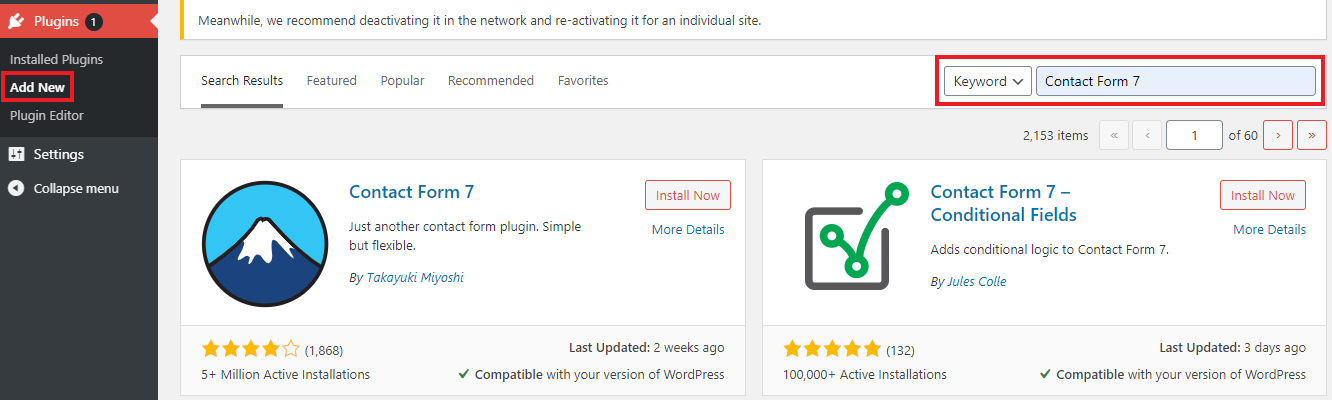
As you can see, the latest version of the WordPress Contact Form 7 plugin is displayed at the top of the list of results. Next to the plugin name, there is one button and one link: ‘Install Now’ and ‘More Details.’ Clicking on the ‘More Details’ link will give you more information about the plugin, while clicking on “Install Now” initiates the installation process.
Once you have installed the plugin, the resulting screen will look something like this:
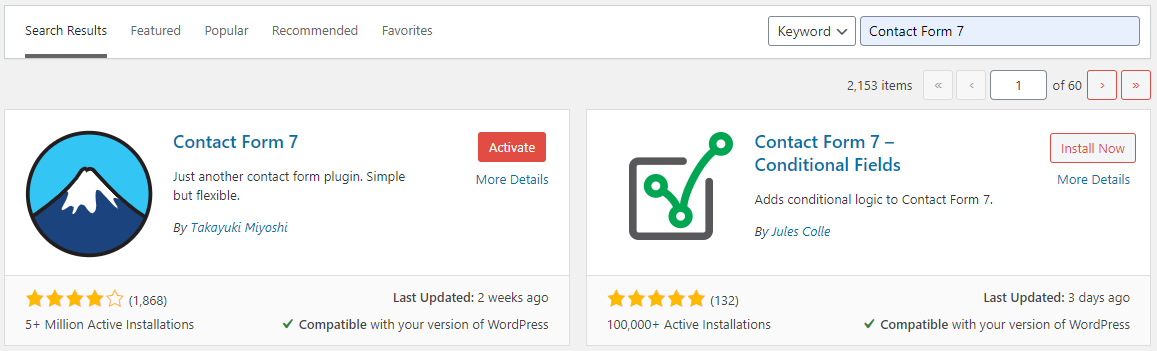
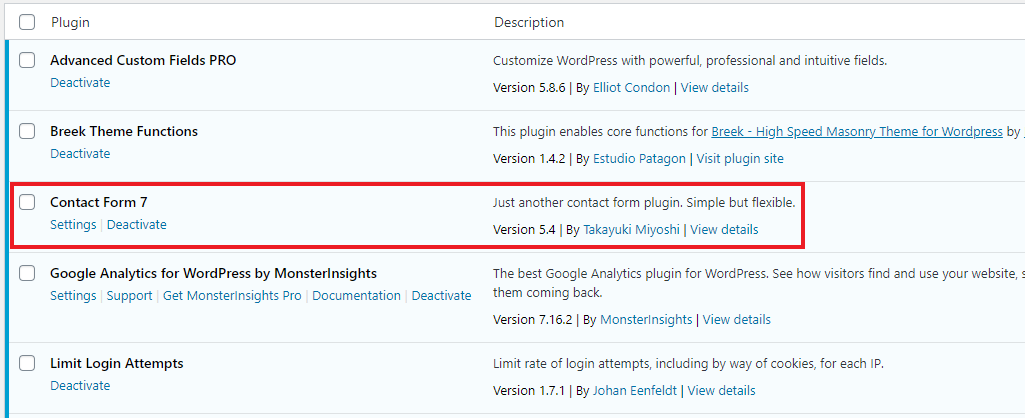
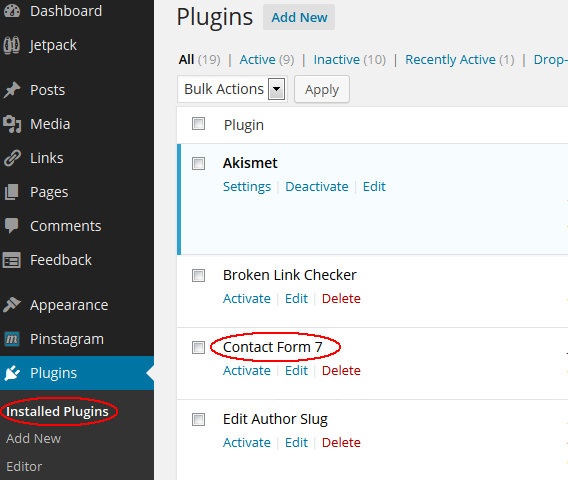
Now, click the ‘Activate’ button to activate the plugin. Once the plugin is successfully updated, you’ll be able to see the WordPress Contact Form 7 plugin under ‘Installed Plugins.’
#Manually, Using Upload Method in the Admin Panel
If the plugin you want to install is not in the official repository for some reason, like it’s a non-GPL, premium, or custom plugin, then this method is for you. To install WordPress Contact Form 7 plugin using this method, you first need to download the plugin’s zip file, then navigate to Plugins >> Add New, and after that, click the ‘Upload Plugin’ button.
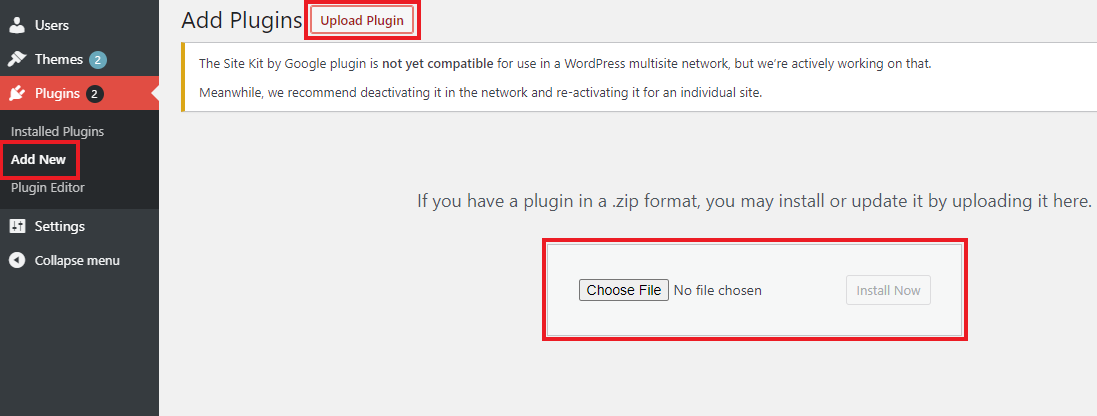
Now, click the ‘Choose File’ button to browse the plugin’s downloaded zip file and click the ‘Install Now’ button. The plugin will get automatically installed on your site, and you’ll be redirected to the ‘Activate Plugin’ page, where you can activate the plugin.
#Manually, via FTP Manager
If you have no idea what an FTP Manager is, this method is not for you. Installation of WordPress Contact Form 7 plugin via FTP requires you to be familiar with FTP applications like Filezilla. If you’re going to use this method, it’s highly recommended you backup your site.
To install the plugin via this method, follow the procedure given below:
- Download the latest version of the plugin from the official repository.
- If the downloaded plugin is in zip file format, unzip it.
- Read the installation and usage instructions, which are typically given in the “readme” file, thoroughly.
- Connect to your site’s server using FTP, access the path public_html/wp-content/plugins, and upload the unzipped plugin folder there.
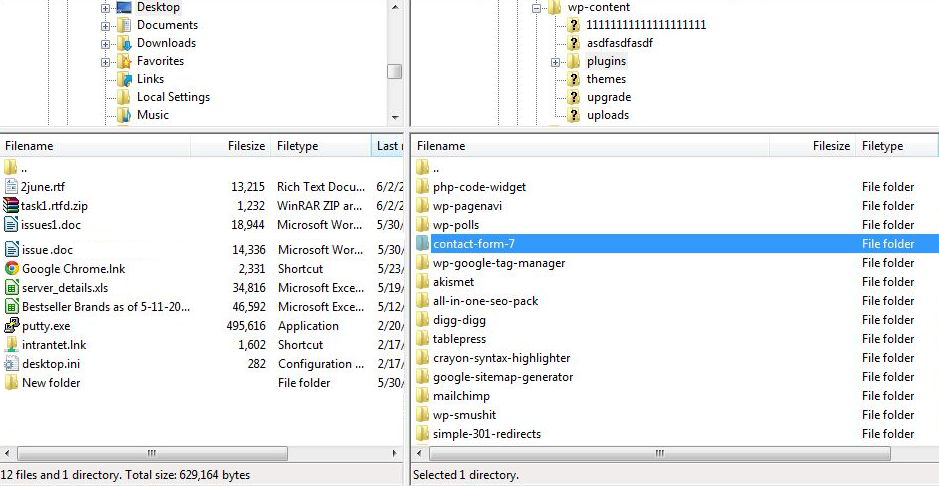
- Once you’ve uploaded the plugin, log in to your Dashboard and go to Plugins >> Installed Plugins. Your newly uploaded plugin will show up in the plugin list. Click ‘Activate’ to turn the plugin on, and you’re done.
How to Configure WordPress Contact Form 7 Plugin?
Contact Form 7 is a simple yet flexible WordPress plugin that you can use to create and manage multiple contact forms. You can also customize the form and the mail contents with simple markup. It supports AJAX-powered submission, file uploading, Akismet spam filtering, CAPTCHA, and so on.
This plugin makes use of Ajax technology to send emails. For instance, if an application’s admin wants to contact users via emails, this plugin is quite helpful.
#How to Display a Form on Your Page
- After downloading the plugin, install and activate it using any of the methods mentioned above.
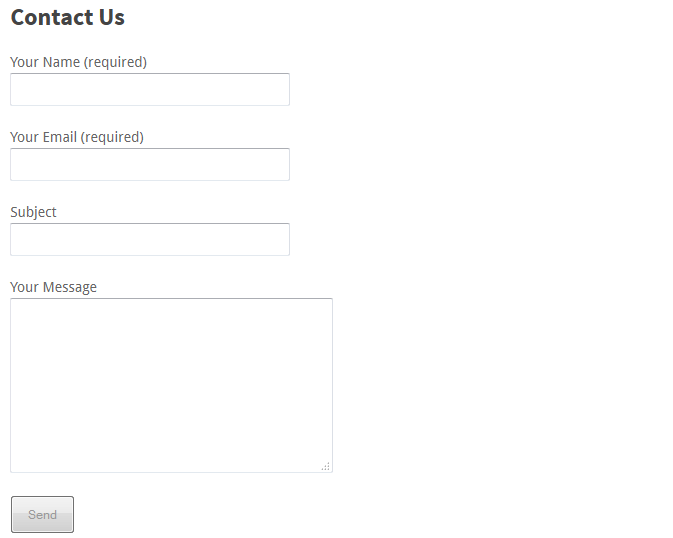
- Once the plugin is activated, you’ll see a menu named ‘Contact’ (just above the ‘Appearance’ menu) on the left side of the admin panel. Click that menu, and you’ll see a default contact form named ‘Contact form 1’ along with its Shortcode like this:
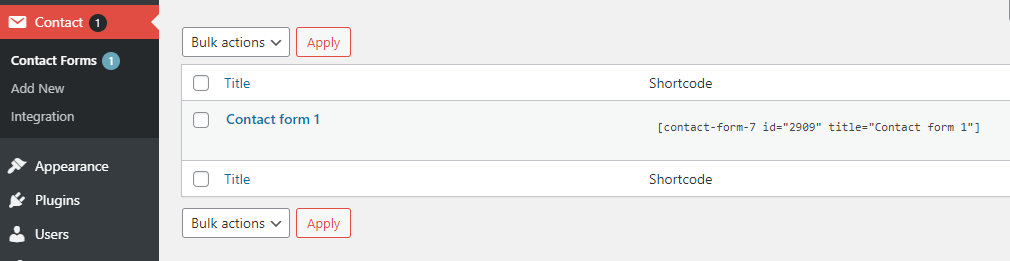
- Copy the given Shortcode, and place it on the page or post where you want to display the Contact form. Now visit the page on which you’ve put the code, and you’ll find the contact form there.
#How to Customize Your Forms and Mail
If you think the default form is too simple and want to add some more fields to it, you can edit the form template and add other fields. To customize your form, go to ‘Contact >> Contact form 1 >> Edit’. After you click, you’ll be taken to the admin screen of the form template, as shown in the screenshot below:
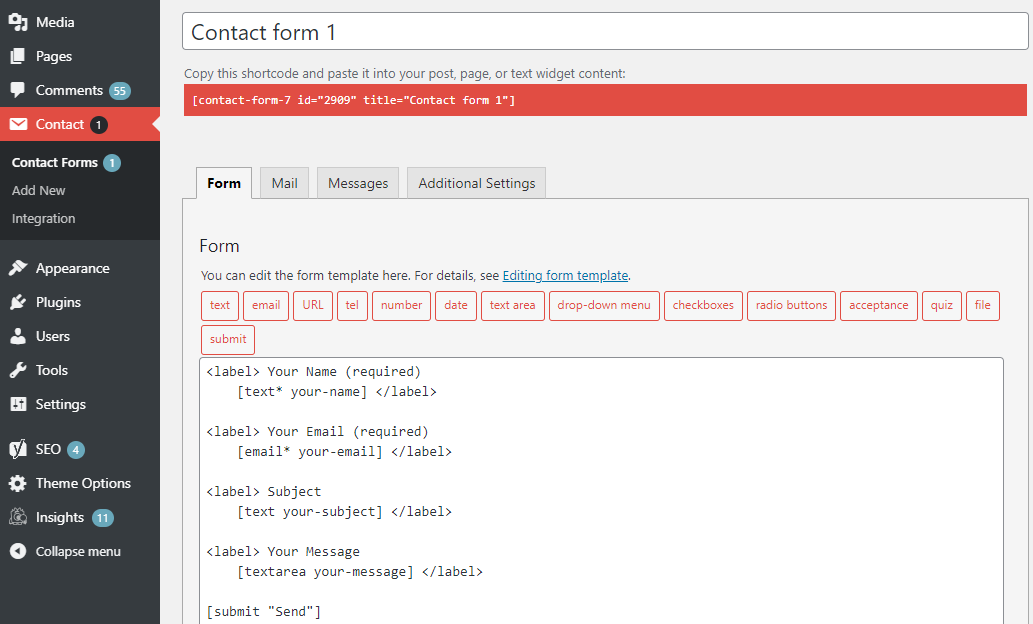
Now, let’s understand every section shown in the graphic above one by one:
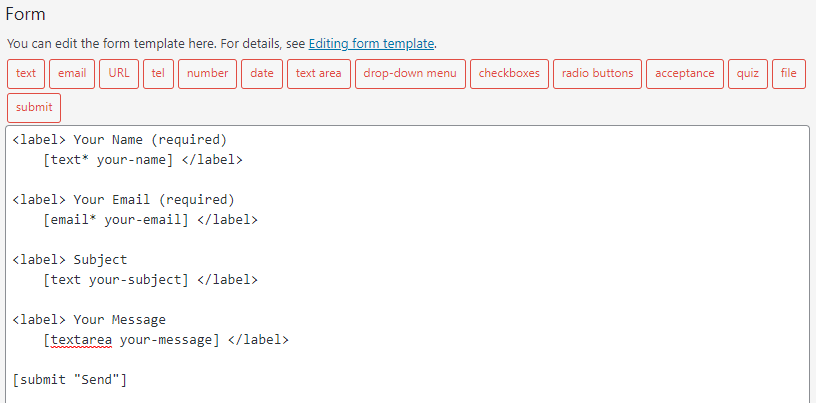
Form Editing Box:
Using the form editing field, you can configure the contents of your contact form. Here, you’re allowed to use HTML tags or form-tags. Blank Lines and Line Breaks are formatted automatically with HTML tags, respectively.
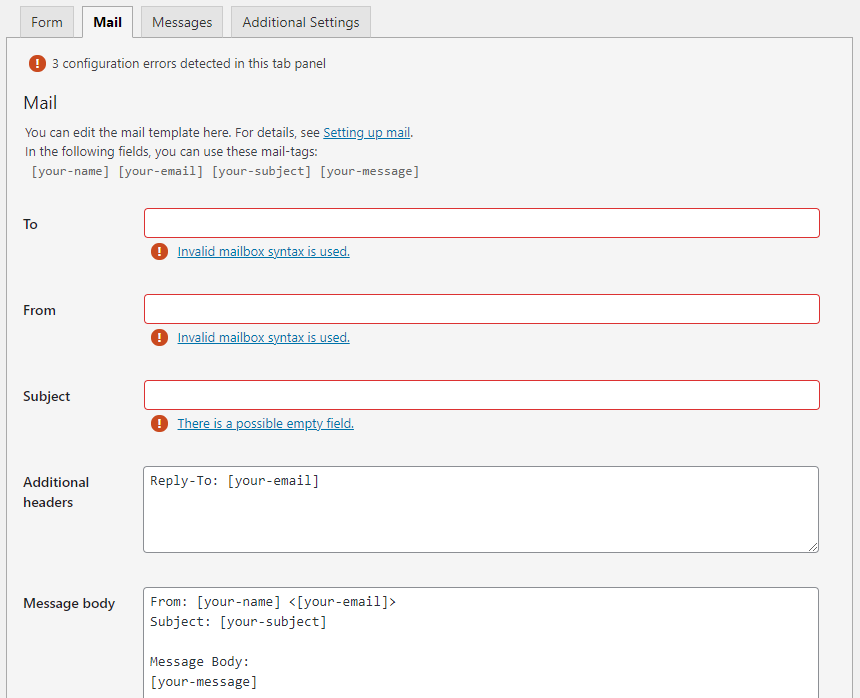
Mail Template Section:
In this section, you can configure the contents of mail sent to users. In these fields, you can use mail-tags.
Mail (2) Template Section:
It is an extra mail template that can send different messages to different recipients using the first mail template.

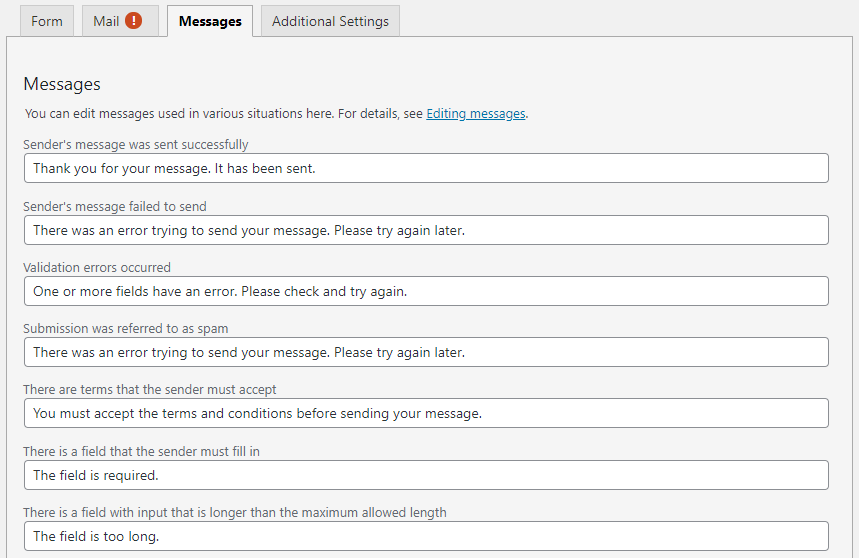
Messages:
Here you can edit messages shown to users in various situations as per your interest.
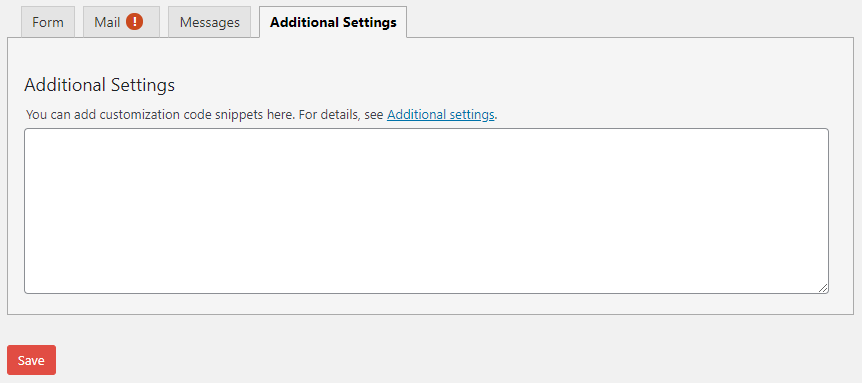
Additional Settings:
You can use this section if you want to run custom JavaScript or other codes after submission. For instance, if you want to redirect your users to a “thank you” page after the form has been submitted, this section will add the custom code.
How to Add Captcha on WordPress Contact Form 7 Plugin?
WordPress Contact Form 7 plugin allows you to implement reCAPTCHA in your contact forms to protect them against spam and other types of automated abusive form submissions. You can use reCAPTCHA in your contact forms through the reCAPTCHA integration module in a few simple steps:
#Register a Site
Sign in to your Google account and go to the My reCAPTCHA page. You’ll see a simple registration form like this:
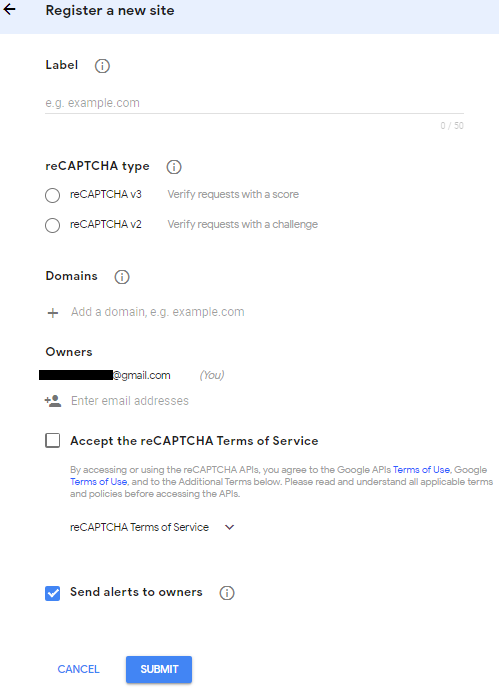
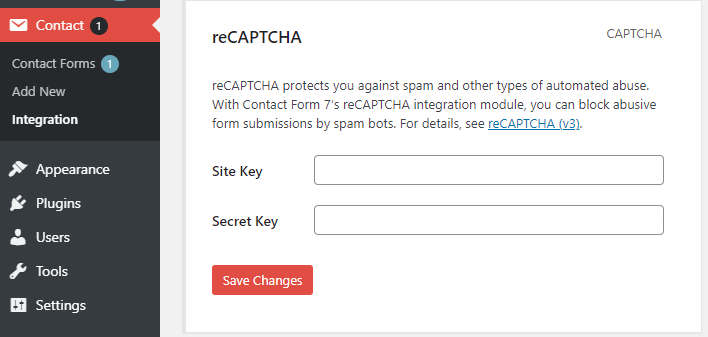
Choose reCAPTCHA v3 from type options, and enter your domain. Once you click the submit button, you’ll get the site key and secret key for your WordPress site.
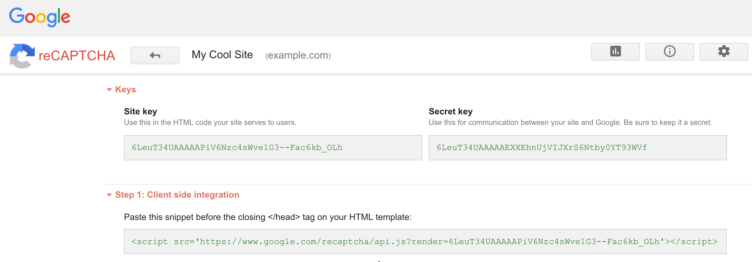
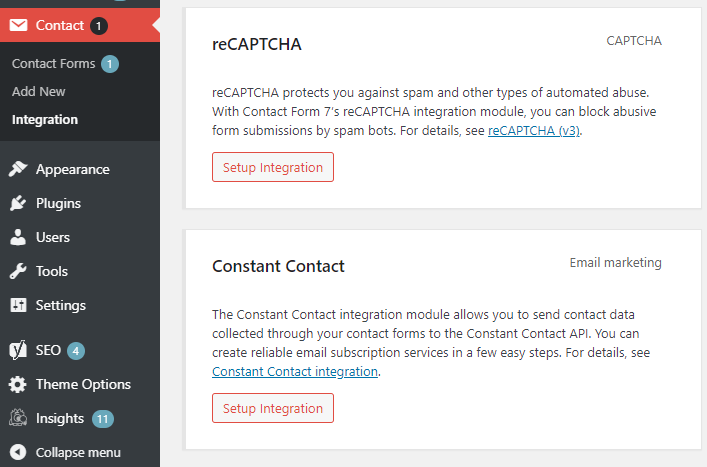
Next, navigate to Contact >> Integration in your Dashboard and click Setup Integration in the box titled reCAPTCHA.
Copy-paste the two keys you received into input fields, and click Save Changes.
That’s it. Your contact forms will now use reCAPTCHA’s score to verify if the form submission is spam or from a human. If you need any help regarding installing and configuring WordPress Contact Form 7 or any other plugin, feel free to hire certified WordPress experts from a reliable agency.